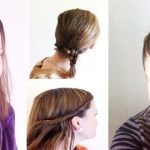

In this continuing series – 7 days of hairstyle how-to’s – we’re sharing hairstyle tips and ideas from some of our readers. This week, Tamsin Howse shares 7 different ‘dos she created with her hair over 7 consecutive days, along with easy to follow how-tos so you can re-create the hairstyles you like best at home.
The idea came about after we ran a challenge to see if we could wear our hair in a different style each day for 7 days straight. We called it The Hair Dare. We were inundated with so many awesome hairstyles that we’d be doing a disservice to ‘The Sisterhood’ if we didn’t share these ‘dos around.
This week’s hairstyle how-to’s are brought to you by Tamsin.
Tamsin Howse is a wife, stepmother and blogger with a passion for people and relationships, fashion and beauty, and an inability to successfully complete household tasks. She blogs here and is also the co-founder of KiKi & Tea.
I’ll admit it; I’m lazy with my hair. I strongly believe in putting some effort into doing your hair, but I’m blessed with hair that requires very little effort. So most days I wear my hair out, washed and blow-dried.
The Hair Dare was a great opportunity for me to break out of my rut and remind myself I actually know a lot of hairstyles that I usually only bust out for a special occasion.
Day One: Easy Chignon

Complicated looking – easy to do!”
Step 1: Pull hair into a low ponytail and tie.
Step 2: Separate the tail into two parts, and twist each section.
Step 3: Twist them around each other in the opposite direction to Step 2 (this is important, as it’s the only way the twist won’t unravel) and secure with a hair tie.
Step 4: Pull the twisted pony into a bun and pin.
Day Two: Cross-Stitch

Why not cross stitch your hair?”
Step 1: Pull back the front section of your hair and pin at the crown.
Step 2: Pull a piece of hair from just below the pinned back section on the right side across your head and pin.
Step 3: Repeat step 2 with a piece from the left side.
Step 4: Repeat with a few sections (usually until you reach your ears).
Day Three: Roses

Step 1: Pull the front right hand section of your hair, from your part to your ear, back to the crown of your head.
Step 2: Twist it around your finger to make a mini-ballerina bun.
Step 3: Pin using 2 bobby pins in an X to hold securely.
Step 4: Repeat Steps 1-3 with the left front section.
Tip: These two sections should be done until they are neat with a nice sweep. The sweep can be achieved by pulling the hair back loosely, but pinning tightly to the head.
Step 5: Repeat Steps 1-3 with the rest of your hair, taking small sections at a time, starting from the top down the head.
Tip: For the best effect, mix up the size of the sections you take.
Day Four: Twisted Pony

Everyone loves a cute pony!”
Tip: For best results, start with the messy curls created from Day 3’s hairstyle, ‘Roses’.
Step 1: Twist the front right hand section of your hair (part to ear) back towards the crown, keeping close to the scalp.
Step 2: Pin the twist at the crown, using your bobby pins in the X shape.
Step 3: Repeat Steps 1-2 with the front left hand section of your hair.
Step 4: Tie the rest of your hair into a pony on top of the spot the twists are pinned.
Step 5: Insert 3 bobby pins – first two in an X at the base of your hair tie. The third from the top, over the hair tie, down through the pony and over the X at the base. This will hold your pony in place.
Day Five: Fishtail Braid

Grown up take on plaits.”
Step 1: Start slightly up your head, taking the top section of your hair as you would to start a normal braid.
Step 2: Separate into two sections.
Step 4: Take a small piece from the outside of one section, pull across to meet the other section. Repeat from the other side.
Step 5: Continue down your head, collecting more hair into the sections on the way down. The trick with a fishtail is to never use the whole section of hair.
Step 6: Secure the bottom with a tie and if you have enough hair left over, tie a piece over the top of the tie, securing with a bobby pin.
Tip: Pushing the bobby pin in from the bottom of the hair tie, over the tie and back up into the braid will hide the pin better than putting it in facing down.
Day Six: Volume And Shout

Tip: For best results, follow this guide to wash your hair. Then comb it.
Step 1: Tip your head upside down and blow dry, directing your dryer at the roots, until you have removed 90% of the moisture.
Step 2: Blow dry in sections from the bottom up with a round brush, pinning the rest of your hair on the top of your head out of the way.
Tip: I recommend using a clip and bunching it up on the top of your head to avoid losing volume.
Step 3: To get a flick at the bottom of your hair, wrap it around the round brush and blast with the hairdryer.
Day Seven: Grown Up Pigtails

Cheeky pigtails for a Sunday BBQ”
Tip: For best results, do this style the day after blow-drying your hair. This will ensure your hair is nicely styled.
Step 1: Part your hair (I part mine slightly to the side) and separate into two sections.
Step 2: Tie into low pigtails at the nape of your neck.
Step 3: Add red lipstick!
Products
I used shampoo and conditioner (Redken), hair ties and bobby pins. Yep, that’s it! No hair spray or styling products of any kind. I don’t like them.
Also, because styling products are heat activated, sleeping on hair with product in will set the style you slept on, making all that effort you put in to styling your hair in the first place pointless when you come to your second day.
I also recommend (and this is a bit of a secret trick) not brushing your hair after the original style. Just leave it, sleep on it, tie it back, touch it as little as possible – you’ll get a lot longer between washes.
Happy styling!”
Check out Tamsin’s blogs here and here, and hang with her Twitter here.
Here’s to another week of fab hair!
![]()